Stages in Deployment Workflow
The Calibo Accelerate platform enables you to build a robust deployment workflow by creating different stages for technology stack promotion. A stage in the Calibo Accelerate platform Deployment Workflow represents an environment in the product development cycle. On the Deployment Workflow screen, the Dev stage is created by default. This is your development environment, where typically developers work on feature development.
You can edit the default configuration of the Dev stage (but cannot delete the stage) and create and manage new stages as per your code promotion strategy.
The number of stages in a typical deployment workflow can vary based on the complexity and requirements of your software development process. However, a standard deployment workflow can usually include the following stages:
-
Development (Dev) Stage: This is the default stage where developers work on feature development and initial testing.
-
Quality Assurance (QA) Stage: You can promote code from the Dev stage to undergo comprehensive testing, ensuring quality and functionality.
-
User Acceptance Testing (UAT) Stage: Here, the software is tested in an environment that simulates the production environment, allowing users to validate its functionality.
-
Demo Stage: You can create a stage where stakeholders, including non-technical members, can view and interact with the application.
-
Production Stage: This can be the final stage where the application is deployed for end-users.
When you create a feature having the Develop and Deploy phases, the default Dev stage is created in the deployment workflow within that feature. This is the default stage for feature development and initial testing.
By default, all the available deployment modes and their corresponding default connection configurations are pre-selected. You can directly start using the default Dev stage for technology deployment or can edit the default settings.
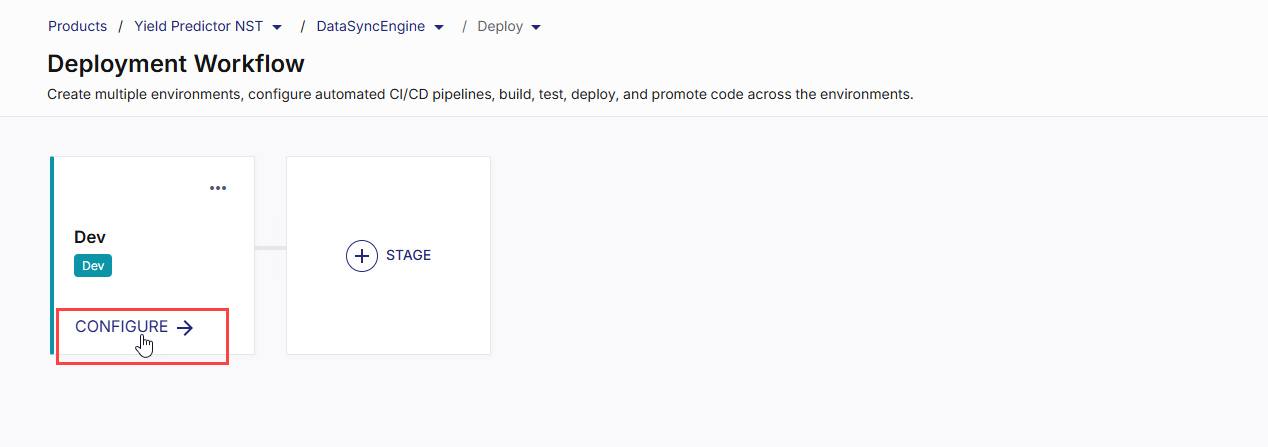
To proceed with default stage configuration, on the Dev stage tile, click CONFIGURE and start deploying technologies in your preferred deployment mode.
Editing Dev Stage Configuration
To edit the Dev stage, do the following:
-
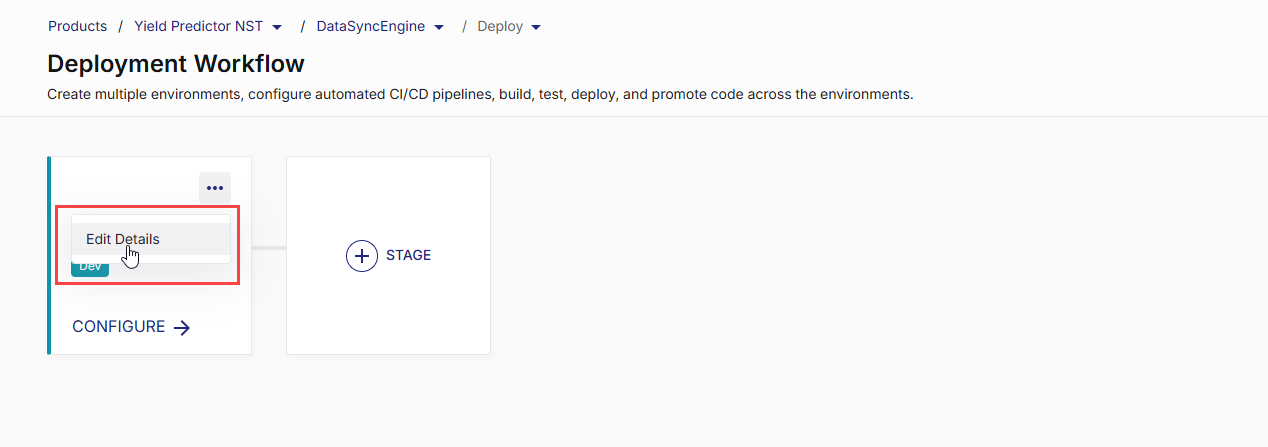
On the Deployment Workflow screen, on the Dev stage tile, click the ellipsis (...) and then click Edit Details.
-
Stage Name and Type
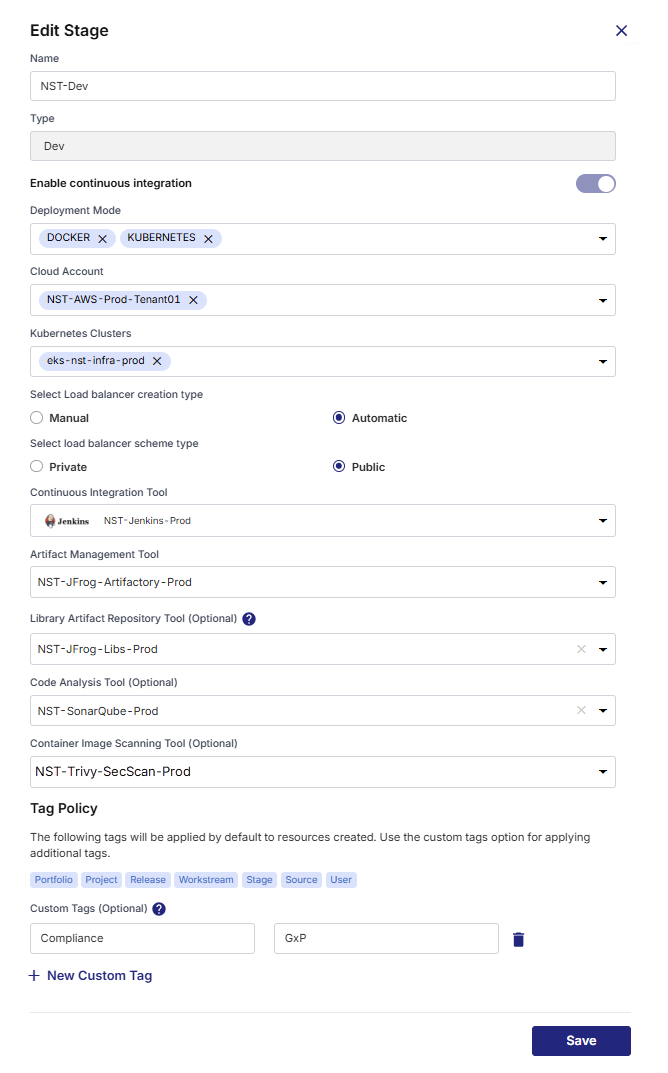
In the Edit Stage side drawer, you cannot change the type of the default Dev stage. However, you can change its name.
For all subsequent stages in the deployment flow, you can enter your desired stage name and select or create your desired stage type (Demo, UAT, Prod, and so on).
After a stage (other than the default Dev stage) is created, you cannot modify its type. You can, however, change the stage name while editing that stage. -
Enable continuous integration
This toggle determines whether CI pipelines should be executed as part of this stage's life cycle in Calibo Accelerate. For the default Dev stage, this toggle is always enabled and non-editable. CI is mandatory here because this stage is meant for building, testing, and verifying new code. It makes sure every code change is automatically checked before moving to higher stages, keeping the pipeline reliable and error‑free.
For more information, see Enable Continuous Integration in Deployment Stage.
-
Deployment Mode
Select your desired deployment modes. Depending on your selected modes, configure the following details for each mode: Docker
If you select the Docker deployment mode, you need to configure the following options.
Cloud Platform Account
The default cloud platform account configuration is auto-selected for deploying technologies on Docker containers. You can either proceed with this default account or choose another from the list of your configured accounts. You have the flexibility to select multiple cloud accounts, enabling separate Docker deployments for different technologies across various accounts.Select Load Balancer Creation Type
In the context of Docker deployments, load balancers ensure efficient utilization of resources and maintain high availability by distributing requests across various containers. Choose whether you want to create a load balancer manually or let the Calibo Accelerate platform create one automatically.For automatic load balancer creation, you must associate at least one security group with your load balancer in the AWS account connection details. See Configure Connection Details of Cloud Service Provider Accounts.
Select Load Balancer Scheme Type
For automatic load balancer, choose whether to create a private (internal) load balancer or public (internet-facing) load balancer.Tag Policy
This section allows you to manage tags applied to various cloud resources such as cloud instances, load balancers, and more that are created from within the deployment stage.-
Predefined Tags
Calibo Accelerate platform provides a set of predefined tags that are automatically applied to all resources. These tags are prefixed with the term "Lazsa" to distinguish them. The predefined tags include:
-
Portfolio: Identifies the portfolio to which the resource belongs.
-
Project: Specifies the project associated with the resource.
-
Release: Indicates the release version.
-
Feature: Marks the specific feature linked to the resource.
-
Stage: Denotes the deployment stage (for example, Dev, QA, Prod, and so on).
-
Source: Identifies the source of the resource.
-
User: Tags the user responsible for the resource.
-
These predefined tags are applied by default and help in organizing and tracking resources effectively.
-
Custom Tags
You can also create your own custom tags to meet specific needs. Create tags in key-value pairs. Do not use "name" as a key to prevent conflicts.
Custom tags are mandatory if your organization enforces tag policies at the organization level. This means if your organization's tag policy requires certain tags to be used for all cloud resources, you must add these custom tags in this section. Otherwise resource creation may fail.
 Kubernetes
Kubernetes Clusters
Your default Kubernetes cluster configuration is auto-selected for technology deployments and all your other available Kubernetes cluster configurations are provided in the dropdown list. Select one or more cluster configurations as per your deployment requirements.
 OpenShift
OpenShift Cluster
Your default OpenShift cluster configuration is auto-selected for technology deployments and all other available OpenShift cluster configurations are provided in the dropdown list. Select one or more cluster configurations as per your deployment requirements.
 Terraform
Terraform Configuration
All your saved Terraform connection configurations are available in the dropdown list. Select one or more configurations as per your infrastructure automation requirements.
-
-
Select Continuous Integration Tool
Your default DevOps CI/CD pipeline tool configuration is auto-selected to automate and streamline the CI/CD process for your technologies. All other available CI/CD tool configurations are provided in the dropdown list. Select your desired tool instance from the dropdown list. -
Artifact Management Tool
The default configuration is auto-selected. You have the flexibility to select any other artifact management tool available in the dropdown list.Artifactory Environment (Optional)
You see this option if:
-
You select JFrog Artifactory instance as the artifact management tool
-
In the saved connection details of this instance, you have chosen to use a project for repository management.
See Configure Connection Details of Artifact Management Tools.
In the Artifactory Environment list, select an environment (for example, development, staging, production) to which you want to associate the repositories in JFrog Artifactory. If you do not specify an environment, the repository will not be associated with any project.
To create a new custom environment in Artifactory from within the Calibo Accelerate platform, type the name of the environment. Custom environments are supported for JFrog Artifactory 7.53.1 or later versions.
-
-
Library Artifact Repository Tool (Optional)
Calibo Accelerate supports publishing Maven-, Gradle-, or NPM-based technologies as reusable library artifacts to your configured JFrog Artifactory repositories. In the dropdown list, the JFrog Artifactory configurations saved in your Calibo Accelerate platform tenant are listed. Select the one where you want to publish library artifacts.

Note:
The Library Artifact Repository Tool option appears only when at least one Library technology exists in the Develop phase.
For detailed information about how to publish technologies as reusable libraries, see Publishing Technologies as Reusable Libraries
-
Code Analysis Tool (Optional)
Select the code analysis tool to be used in the CI/CD pipeline for the deployment stage. -
Container Image Scanning Tool (Optional)
Select the container image scanning tool to be used in the CI/CD pipeline for the deployment stage. -
Save your changes. You are all set to start deploying technologies using your configured deployment modes within the Dev stage.
Note:
If a policy template has been applied to your product, and if the policy template does not allow you to make modifications in stage configuration in the Deploy phase, you cannot create new stages. See Policy Templates.
In the deployment flow, in addition to the default Dev stage, you can create and manage stages as per your code promotion strategy. You can add as many deployment stages of various types (QA, demo, UAT, prod, and so on) as you require. To create a new deployment stage, do the following.
-
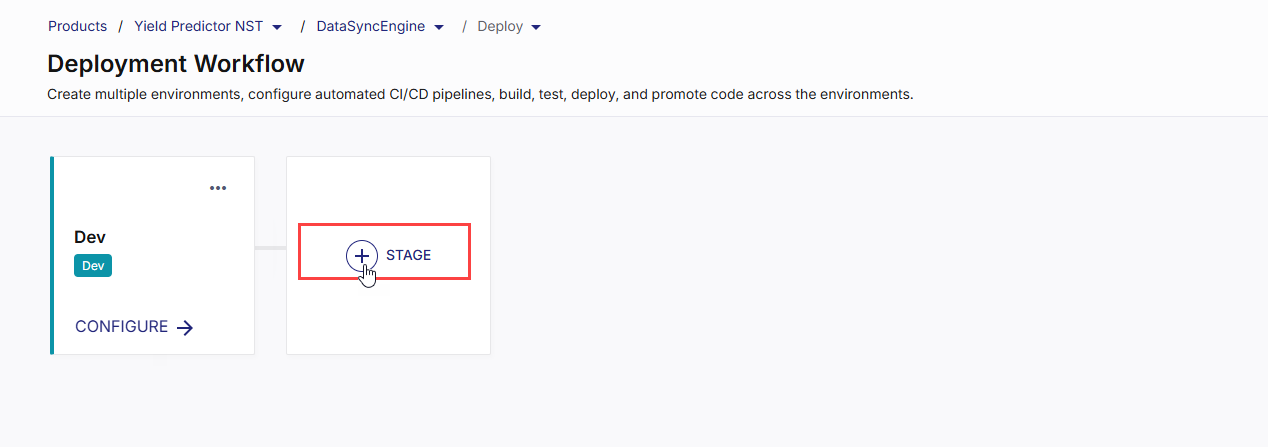
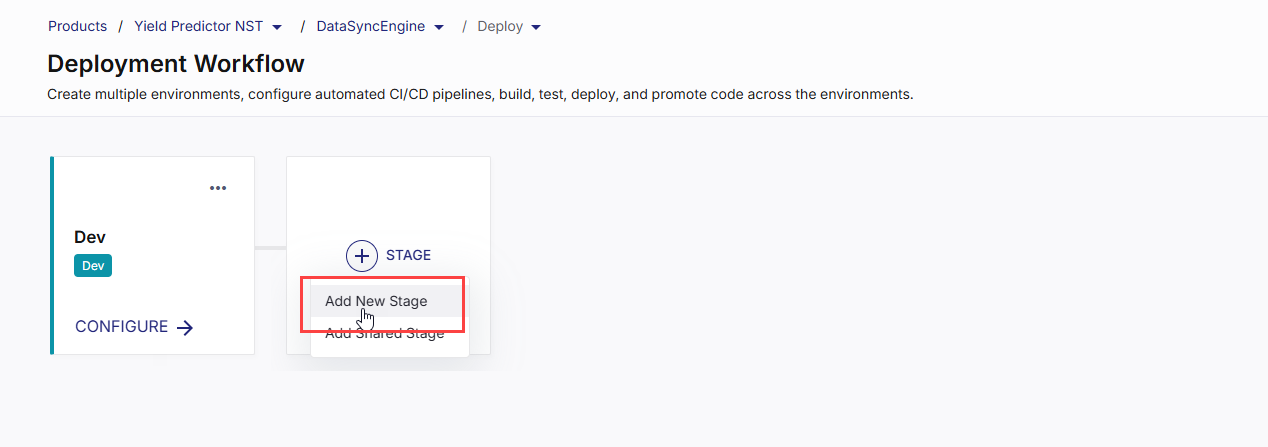
On the Deployment Workflow screen, click +STAGE.
-
In the context menu, click Add New Stage.
In the Add New Stage side drawer, do the following:
-
Name:
Provide a logical name for your deployment stage such as QA Stage, UAT Stage, Prod Stage, and so on. After a stage is created, you cannot modify its type. You can, however, change the stage name while editing that stage.
-
Type
Select the stage type from Demo, UAT, and Prod, or enter a custom type.
-
Make this a shared stage
Turn on this toggle to share the cloud resources created in this stage among other features within the same product. You or other fellow developers can add this shared stage to the deployment flow of another feature within the same product. This simplifies resource management in a collaborative environment.
The default Dev stage cannot be shared.
-
Enable continuous integration
Enable this toggle to trigger the CI pipeline for the stage. When turned on, your configured CI tool (for example, GitHub Actions or Jenkins) automatically builds, tests, and packages code as part of the deployment flow. For more information, seeEnable Continuous Integration in Deployment Stage
-
Deployment Mode
Select your desired deployment modes. Depending on your selected modes, configure the following details for each mode: Docker
If you select the Docker deployment mode, you need to configure the following options.
Cloud Platform Account
Choose your desired cloud platform account configuration for deploying technologies on Docker containers. You can select multiple cloud accounts if you want separate Docker deployments for different technologies across various accounts.Select Load Balancer Creation Type
In the context of Docker deployments, load balancers ensure efficient utilization of resources and maintain high availability by distributing requests across various containers. Choose whether you want to create a load balancer manually or let the Calibo Accelerate platform create one automatically.For automatic load balancer creation, you must associate at least one security group with your load balancer in the AWS account connection details. See Configure Connection Details of Cloud Service Provider Accounts.
Select load balancer scheme type
For automatic load balancer, choose whether to create a private (internal) load balancer or public (internet-facing) load balancer.Tag Policy
This section allows you to manage tags applied to various cloud resources such as cloud instances, load balancers, and more that are created from within the deployment stage.-
Predefined Tags
Lazsa provides a set of predefined tags that are automatically applied to all resources. These tags are prefixed with the term "Lazsa" to distinguish them. The predefined tags include:
-
Portfolio: Identifies the portfolio to which the resource belongs.
-
Project: Specifies the project associated with the resource.
-
Release: Indicates the release version.
-
Feature: Marks the specific feature linked to the resource.
-
Stage: Denotes the deployment stage (e.g., Dev, QA, Prod).
-
Source: Identifies the source of the resource.
-
User: Tags the user responsible for the resource.
-
These predefined tags are applied by default and help in organizing and tracking resources effectively.
-
Custom Tags
You can also create your own custom tags to meet specific needs. Create tags in key-value pairs. Do not use "name" as a key to prevent conflicts.
Custom tags are mandatory if your organization enforces tag policies at the organization level. This means if your organization's tag policy requires certain tags to be used for all cloud resources, you must add these custom tags in this section. Otherwise resource creation may fail.
 Kubernetes
Kubernetes Clusters
Select one or more Kubernetes cluster configurations as per your deployment requirements. The clusters you select here will be available for your workload deployments in the Kubernetes Clusters section on the Deployment tab.
 OpenShift
OpenShift Cluster
Select one or more OpenShift cluster configurations as per your deployment requirements. The clusters you select here will be available for your workload deployments in the OpenShift Clusters section on the Deployment tab.
 Terraform
Terraform Configuration
All your saved Terraform connection configurations are available in the dropdown list. Select one or more configurations as per your infrastructure automation requirements.
-
-
Select Continuous Integration Tool
Select your desired DevOps CI/CD pipeline tool instance to automate and streamline the CI/CD process for your technologies. All the available CI/CD tool configurations are provided in the dropdown list. -
Artifact Management Tool
Select your desired artifact management tool from the dropdown list.Artifactory Environment (Optional)
You see this option if:
-
You select JFrog Artifactory instance as the artifact management tool
-
In the saved connection details of this instance, you have chosen to use a project for repository management.
See Configure Connection Details of Artifact Management Tools.
In the Artifactory Environment list, select an environment (for example, development, staging, production) to which you want to associate the repositories in JFrog Artifactory. If you do not specify an environment, the repository will not be associated with any project.
To create a new custom environment in Artifactory from within the Calibo Accelerate platform, type the name of the environment. Custom environments are supported for JFrog Artifactory 7.53.1 or later versions.
-
-
Code Analysis Tool (Optional)
Select the code analysis tool to be used in the CI/CD pipeline for the deployment stage. -
Container Image Scanning Tool (Optional)
Select the container image scanning tool to be used in the CI/CD pipeline for the deployment stage. -
Save your changes.
-
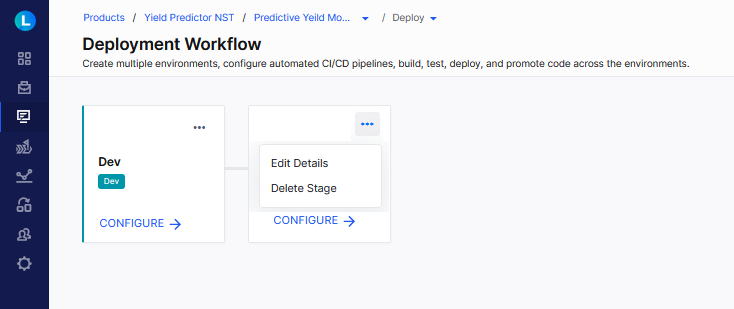
After you save the stage configuration details, your newly created stage is added to the deployment workflow. To edit or delete a stage, on the stage tile, click the ellipsis (...) in the upper right corner, choose the desired option.
-
On the stage tile that you want to edit, click the ellipsis (...) in the top right corner, and then click Edit Details.
-
In the Edit Stage side drawer, you cannot change the stage type. For information about all the other fields, refer to the Creating a new stage section.
Field Description Name You can change the name for your deployment stage. Make this a shared stage Turn on the toggle to share the cloud resources created in this stage among other features within the same product. Other developers in your product team can use a shared stage for their feature development. This feature simplifies resource management in a collaborative environment.
Turn off the toggle if you do not want to share the stage.
The default Dev stage cannot be shared.
Enable continuous integration Enable this toggle to trigger the CI pipeline for the stage. When turned on, your configured CI tool (for example, GitHub Actions or Jenkins) automatically builds, tests, and packages code as part of the deployment flow.
For more information, seeEnable Continuous Integration in Deployment Stage
Type This field is uneditable. Deployment Mode Select the desired deployment modes from the dropdown list:
-
Docker
-
Kubernetes
-
OpenShift
-
Terraform
You can select multiple modes based on your deployment requirements.
Cloud Account Select from the list of configured cloud platform accounts. Select the specific cloud account for deploying your technologies, whether on Docker, Kubernetes, OpenShift, or using Terraform scripts. You have the flexibility to select multiple cloud accounts, allowing separate deployments for different technologies across various accounts. Terraform Configuration Select from the list of configured Terraform Cloud workspaces or Git repositories. You can select multiple workspaces or repositories for managing your Terraform runs within the Calibo Accelerate platform. Kubernetes Clusters Select from the list of configured Kubernetes clusters. You can select multiple clusters and plan separate deployments for different technologies across various clusters. OpenShift Clusters Select from the list of configured OpenShift clusters. You can select multiple clusters and plan separate deployments for different technologies across various clusters. Load Balancer Creation Type This option is available if you select the Docker deployment mode. In the context of Docker deployments, load balancers ensure efficient utilization of resources and maintain high availability by distributing requests across various containers.
Choose whether you to create a load balancer manually or let the Calibo Accelerate platform create one automatically. For automatic load balancer, choose whether to create a private (internal) load balancer or public (internet-facing) load balancer.
For automatic load balancer creation, you must associate at least one security group with your load balancer in the AWS account connection details. See Configure Connection Details of Cloud Service Provider Accounts.
Continuous Integration Tool Select from the saved CI/CD pipeline tool configurations. Artifacts Management Tool Select from the list of configured artifacts management tools provided by your administrator. You have the flexibility to select multiple artifacts management tools, allowing you to use a distinct tool for each stage. If you do not make a selection here, the configured artifacts management tool that you mark as default is used.
See Configure Connection Details of Artifact Management Tools.
Code Analysis Tool (Optional) Select from the list of configured SonarQube instances. This instance is used in the CI/CD pipeline in the Code Quality Scan stage.
See Configure Connection Details of Security Assessment Tools.
Container Image Scanning Tool (Optional) Select from the list of configured container image scanning tools (Qualys). This instance is used in the CI/CD pipeline in the Code Security Scan stage.
See Configure Connection Details of Security Assessment Tools.
Tag Policy Predefined tags like Portfolio, Project, Release, Workstream, etc., are applied to the resources in this stage by default. Use custom tags for additional tagging of resources. Create custom tags in key-value pairs. Do not use "Name" as a key. Custom tags are mandatory if organization-level tag policies are enforced. Save your changes. -
When creating or modifying a deployment workflow stage, you can make a stage sharable. This feature enables you and other developers in your product team to efficiently utilize resources generated in one stage for other feature developments within the same product.
To add a shared stage in the deployment workflow, do the following:
On the Deployment Workflow screen, click +STAGE to add a stage to your deployment workflow.
In the context menu, click Add Shared Stage.
In the Add Shared Stage side drawer, select the feature from which you want to select the shared stage, and the shared stage that you want to use.
Click Add.
Let's understand how to manage technology deployments in the default Dev stage.
On the Deployment Workflow screen, in the stage tile that you want to configure, click CONFIGURE.
The Dev screen contains the following tabs:
-
Deployment
The Deployment tab displays the available deployment modes based on your selections in the stage configuration. By default, in the Dev stage, all deployment modes (Docker, Kubernetes, OpenShift, and Terraform) are pre-selected. The Dev stage is designed to serve as your development environment, providing a range of deployment options to suit your project requirements.